Category: Science experiments
-

How to Inflate Balloon with Vinegar and Baking Soda
Inflating the balloon with vinegar and baking soda is a classic experiment. Perform this experiments with your friends, and explain to them what is happening? You won’t need to buy anything, all the materials you will find in your kitchen easily. In this experiment, you will learn how the gas […]
-

How to Make Rock Candy at Home
Making delicious rock candy at home is a fun and good science experiment. It will help you to understand saturated and supersaturated solutions. You will love to see how crystals grow on a wooden stick as time passes. You can taste and eat the crystal that you will make. Precaution: Always […]
-

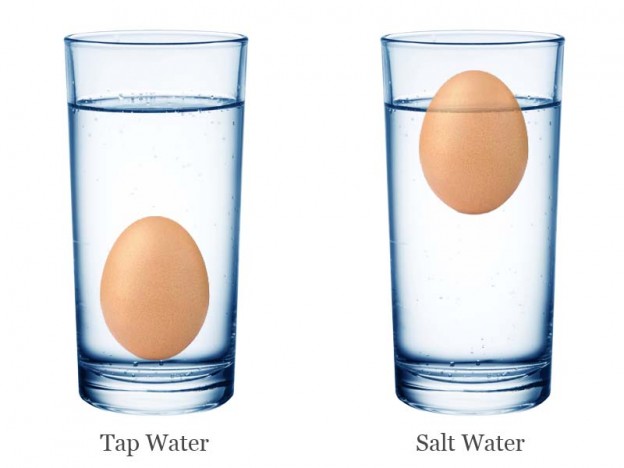
Floating Eggs in Salt Water
It is commonly observed that eggs will sink to the bottom of the water when they are placed in ordinary tap water. So, how this happens? And how eggs float in salt water? We will do a simple classic salt water and egg experiment to understand the science behind it. […]
-

How to Make Invisible Ink
Do you want to write some secret messages that no one can see without you? Learn how to make invisible ink from household materials, and start writing your secret messages and symbols. This is a very interesting science experiment, you will get a lot of fun. Precaution: Always wear safety goggles […]
-

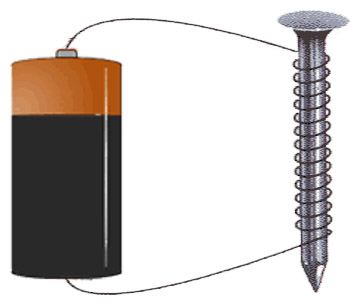
How to Make Simple Electromagnet
An Electromagnet is the kind of magnet, which uses electric current to create a magnetic field. It can attract and magnetize ferromagnetic materials like Iron, Nickel, and Cobalt. It is easy to make a simple electromagnet at your home from household materials. Things You Will Need Thin Plastic insulated wire […]