blowing-soap-bubbles

blowing-soap-bubbles
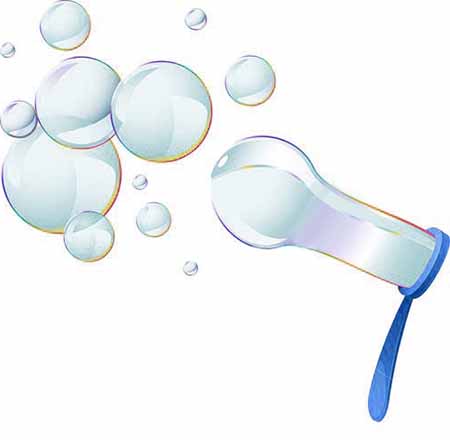
Soap bubbles are one of the most interesting activities of childhood. Let’s make soap bubbles at home with the materials from the kitchen. You will learn how to make a soap bubbles solution and the wand to blow bubbles. Find out! How bubbles work and tips for long lasting bubbles.

Things You Will Need

  • Clean water
  • Liquid dish soap
  • Glycerin
  • Pipe cleaner or straw

How to Make

  1. Pour 3 cups of clean water and a half cup of liquid dish soap into a container.
  2. Stir solution slowly to keep the foam from forming in the solution.
  3. Measure a ½ tablespoon of glycerin and add it to the container. Then, stir the solution again and place it aside.
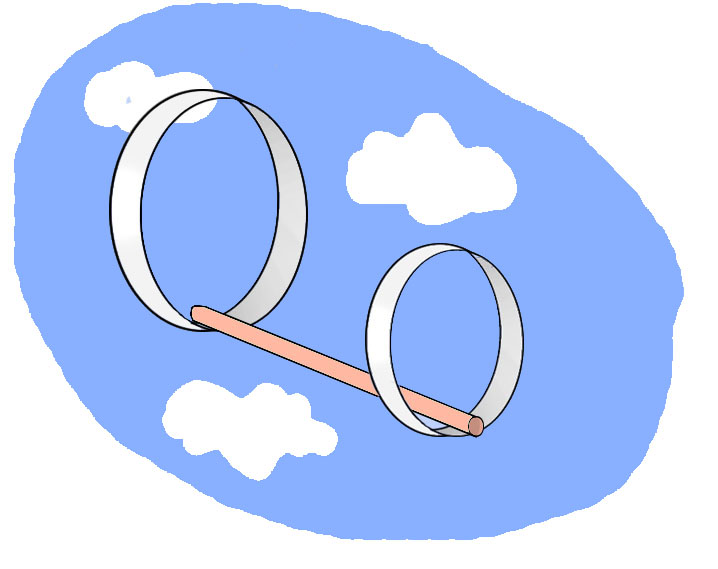
  4. If you have any materials which have a circular hole in it, then it can be used as a bubble Otherwise, you can build one with a pipe cleaner or straw.
  5. To make the wand from straw, just bend its top tip into a circular shape, then fasten it with tape.

Now it is time to blow some bubbles.

Take your bubble wand and dip it into the solution and blow slowly in the hole.

How it Works

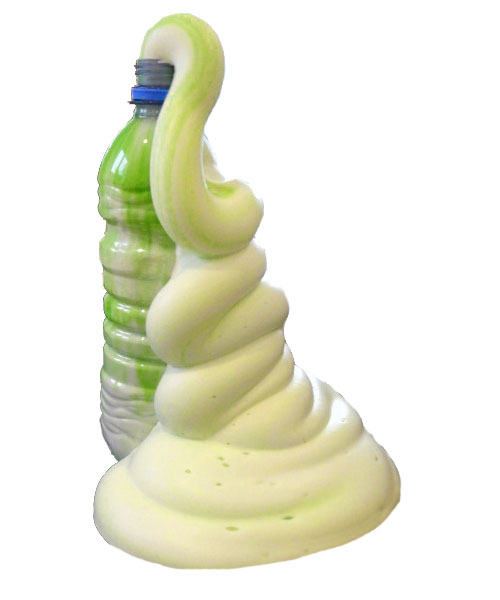
The boundary of the bubble solution is made of three thin layers of soap, water, and again soap. That means water is sandwiched between two layers of the soap. This boundary is called soap film. When water evaporates from layers of soap than the bubble pops. Glycerin is mixed with the solution to make layers of soap thick which keeps the water from evaporating quickly. In this way, bubbles become stronger and last longer.
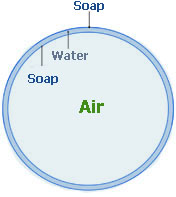
bubble-explained

Try it

  1. Try using different sizes of bubble wand to blow bubbles of different sizes.
  2. Add some drops of food coloring to the solution to make colorful bubbles.
Hoop Glider

Hoop GliderYou have probably seen planes; all with flat wings. But, have you seen anything flying with curly or round wings. Can a curled wing plane fly in the air?

Let’s do an experiment to find out what will happen if we replace the flat wings of a plane with hoops. Let’s see how a plane with hoops can fly in the air?

Things You Will Need

  • 1 Drinking Straw – 6 to 10 inch long is recommended.
  • Stiff paper, File card, or Index card
  • Scissors
  • Tape

How to Make

  1. Take a sheet of stiff paper and cut it into 3 pieces. Each piece measuring 5 inches long and 1 inch wide.
  2. Take one piece of stiff paper and curl it to overlap its end edges, then tape them together to form a small hoop required for a glider.
  3. Take two other pieces of stiff paper and tape their end-edges together to make a long strip.
  4. Curl this long strip to overlap its two end-edges, then tape them together to form the second hoop of larger size.
  5. Tape the two hoops that you made in previous steps with straw. One hoop at one end of the straw, and another hoop at its second end. Straw should be kept inside of the hoops at the time of taping, and make sure that both hoops are aligned.

That’s it! Your glider is ready.

When you want to launch your hoop glider, just hold it in the middle of straw and throw it in the air like you do with a paper plane.

NOTE: Both hoops should be on the top when you hold the straw, and smaller hoop should be facing in the direction of your throw at the time of launch.

How it Works

Two hoops in this glider are used to keep the straw balanced in the air while flying. Small size hoop keeps the glider from turning, and big hoop creates air resistance which keeps the straw leveled. Since both hoops have different weight so you may be thinking why the glider does not turn over? Actually, due to gravity lighter and heavier objects fall at same speed. That’s why the glider maintains its upright position.

Try it

  1. Try to change the length of the straw and see what happens.
  2. Find out! What happens, when the number of hoops is increased? First, try using 3 hoops, then 4.

Balloon rocket is a simple science experiment to understand the newton’s third law. Which states that, “Every action has reaction”. You will build a simple rocket out of a balloon and a straw that will slide over a string by producing thrust.

Precaution: Always wear safety goggles and hand gloves when dealing with chemicals. Also, take permission from your parents for the experiment, or involve them.

You Will Need

  • 1 Balloon
  • 10 to 15 feet of string
  • 1 Drinking Straw
  • Tape

How to Make

  1. Bring two chairs and place them 10 feet apart.
  2. Tie one end of the string with one of the two chairs.
  3. Pass another end of the string through the straw. Then, tie it with the second chair tightly, so that string tied between two chairs become flat.
  4. Blow up the balloon. Then, pinch its mouth with your hand, so that no air escapes from it.
  5. Tape the balloon with a straw while holding the mouth of balloon closed (ask your friend to help you).

Just leave the mouth of the balloon, when you want your rocket to slide over the string. The air from the mouth of balloon rushes out.

Watch your rocket!

How it Works?

When you allow the air to rush out of the balloon, it creates thrust which propels rocket forward. So, how this thrust is produced? Actually, balloon forces the air to rush out of it which in turn pushes the balloon in opposite direction of air. That’s what the Newton said, “Every action has a reaction, which acts in opposite direction”. To summarize this all, if the air rushes leftward then balloon will propel to rightward.How Balloon Rocket Works

Try it

  1. Use two same size balloons in place of one. Tape both balloons with straw in opposite direction and see what happens!
Foamy Fountain

Foamy FountainYou may have seen the water fountains at many parks. These fountains give us very good view parks. So, let’s make this interesting fountain at home. This it will be colored and made of foam. We will call it the foamy fountain, and enjoy its beauty!

The foam that will be produced by the fountain is special because each bubble is filled with oxygen gas. You will also learn how this fountain works and what science is behind it.

Precaution: Always wear safety goggles and hand gloves when dealing with chemicals. Also, take the permission from your parents for the experiment, or involve them.

Things You Will Need

  • Empty plastic bottle about 500ml (half a liter) in volume
  • A half cup of Hydrogen Peroxide (20-volume or 6%)
  • 1 Tablespoon of Yeast
  • Liquid dish soap
  • Food coloring (Red, Green or any color)

How to Make

  1. Pour ½ cup of hydrogen peroxide in the bottle. Be careful! When dealing with hydrogen peroxide. It can irritate the skin, so it will be advisable to get the help of an adult.
  2. Add few drops of food coloring of your choice into the bottle.
  3. Add 1 tablespoonful of liquid dishwashing soap into the bottle.
  4. Close the bottle with cap, and shake it so that all the liquids mix together.
  5. Take a cup and add 3 to 4 tablespoons of water and 1 tablespoon of yeast in it.
  6. Stir the cup with a spoon to mix the water and yeast together.

Your fountain is ready!

When it is time to start fountain, just add water-yeast mixture into the bottle and BOOM!

Note: Fountain will expel-out the foam so you should do this experiment at the washable area of your home.

What is Happening?

When you add the yeast into the bottle which contains the hydrogen peroxide, the breakdown of hydrogen peroxide takes place. The hydrogen peroxide is broken down into water and oxygen gas. The sudden release of oxygen in the bottle causes the bubbling. Because bottle contains liquid soap. These bubbles rush out of the bottle due to the formation of new bubbles. This will until the breakdown of hydrogen peroxide will take place.

Try It

  1. Increase the amount of yeast added to the bottle. Find out, does it affect the rate of reaction?
  2. Increase the amount of Hydrogen Peroxide and also add some water to the bottle. Find out, does it affect the timing of the fountain?
  3. What can you do to increase the height of the fountain? Think about it.
Soap-boat-in-the-water

Soap-boat-in-the-waterUsing detergent to power a boat is a fun science experiment. You will learn to make a boat that runs only on detergent. Find out! How surface tension of water is affected to power your boat.

Things You will Need

  • A sheet of cardboard or Styrofoam
  • Liquid dishwashing soap
  • Dropper or Pencil
  • Scissors

How to Make

  1. Cut a sheet of cardboard into the shape of a boat; it should be 2 inches long and 1.5 inches.
    Soap Boat
  2. Make a triangular shaped notch in its back (as shown in the figure).
  3. Place your boat in a water tub, so that your boat has enough space to move.
  4. Place a drop of liquid dishwashing soap in the notch of your boat with dropper or pencil.

Now, watch your boat going around the tub! It will move forward.

How it Works?

Water molecules are attracted to each other, which creates surface tension in the water. Liquid dishwashing soap is a surfactant; it breaks down the surface tension of water. When you add liquid dishwashing soap in the notch, it breaks the surface tension of water inside the notch. As a result, it creates enough force to push the boat forward. We have used light material (e.g. Styrofoam or cardboard) to build the boat. Because, light materials can be easily pushed when surface tension breaks.

Try it

  1. Use different materials to build your boat and find out! Which material provides more speed?
  2. Can you rotate your boat without moving it forward or backward? Think about it.