Author: Abdul Wahab
-
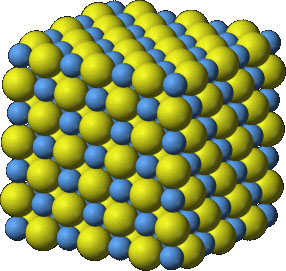
States of Matter
A matter is anything which occupies space and has mass. It is all around us and made up of atoms and molecules of different kinds. We all are made up of matter and we use matter in our daily lives in different forms e.g. eating food, drinking water, sitting on […]
-
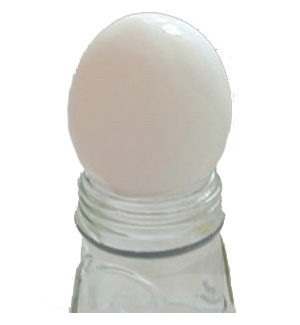
Egg in a Bottle
Egg in a bottle is an easy-to-do classic activity, which you can perform in your kitchen. In this activity, a hard-boiled egg (peeled) is set on the mouth of a bottle and egg is sucked in the bottle magically (actually scientifically). You will learn how pressure difference can cause push […]
-

How to Make Hoop Glider
You have probably seen planes; all with flat wings. But, have you seen anything flying with curly or round wings. Can a curled wing plane fly in the air? Let’s do an experiment to find out what will happen if we replace the flat wings of a plane with hoops. […]
-
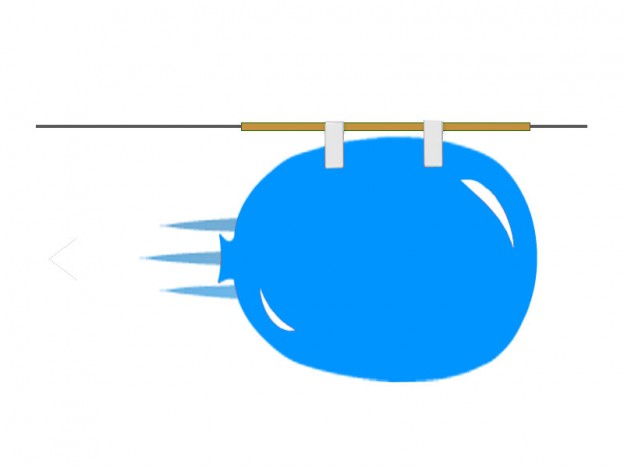
How to Make a Balloon Rocket
Balloon rocket is a simple science experiment to understand the newton’s third law. Which states that, “Every action has reaction”. You will build a simple rocket out of a balloon and a straw that will slide over a string by producing thrust. Precaution: Always wear safety goggles and hand gloves when […]
-
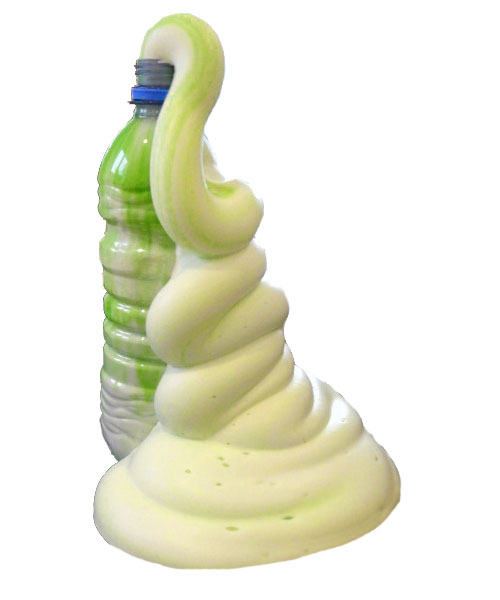
How to Make Foamy Fountain
You may have seen the water fountains at many parks. These fountains give us very good view parks. So, let’s make this interesting fountain at home. This it will be colored and made of foam. We will call it the foamy fountain, and enjoy its beauty! The foam that will […]